OP家的法国独服又打折啦,现在只需5.99欧:
https://oneprovider.com/order/item/dediconf/49
法国location,1TB hdd/128GB ssd,4GB内存,G口不限量独服,价格还是非常上算的,支持Alipay和微信支付
不过这家独服入手后还需要一些调教,分享过程如下:
首先是修改root密码
- 重启进入rescue mode (Ubuntu Image)
sudo fdisk -l查看下系统root分区位置,我的是/dev/sda3- 挂载系统盘:
sudo mount /dev/sda3 /mnt - 再挂载下其他东西:
for d in dev sys run proc; do sudo mount --bind /$d /mnt/$d; done - 然后进入原系统:
sudo chroot /mnt - 最后就可以改下原系统的root密码了:
passwd root
接下来是更替系统自带的vim
我安装的是ubuntu 14.04 lTS 64位,系统自带vim真的辣手,直接删了吧!
apt remove vim*然后 apt install -y vim vim-common
安装bbr,手动更换内核,补齐缺失的驱动
op这个系统啊,好像缺少一些网卡驱动,参考这个网站:
https://npchk.info/oneprovider-10-15eur-kernel/
自动默认目前ubuntu最新内核是5.0.7的,之前没注意直接安装最新内核了,然后安装完毕提示错误:
dpkg: error processing package linux-image-unsigned-5.0.7-050007-generic (--install):
 dependency problems - leaving unconfigured
Errors were encountered while processing:
 linux-image-unsigned-5.0.7-050007-generic
Generating grub configuration file ...
Warning: Setting GRUB_TIMEOUT to a non-zero value when GRUB_HIDDEN_TIMEOUT is set is no longer supported.
Found linux image: /boot/vmlinuz-5.0.7-050007-generic
Found linux image: /boot/vmlinuz-3.13.0-168-generic
Found initrd image: /boot/initrd.img-3.13.0-168-generic
done
也没在意,直接重启,然后就没有然后了,于是ticket客服重新换台机器折腾吧 
重换成功,我们开始手动更换内核为4.10.5
- 下载并安装内核4.10.5
wget http://kernel.ubuntu.com/~kernel-ppa/mainline/v4.10.5/linux-headers-4.10.5-041005_4.10.5-041005.201703220931_all.deb
wget http://kernel.ubuntu.com/~kernel-ppa/mainline/v4.10.5/linux-headers-4.10.5-041005-generic_4.10.5-041005.201703220931_amd64.deb
wget http://kernel.ubuntu.com/~kernel-ppa/mainline/v4.10.5/linux-image-4.10.5-041005-generic_4.10.5-041005.201703220931_amd64.deb
dpkg -i linux-*.deb
- 下载安装内核缺少的网卡驱动
mkdir -p /lib/firmware/bnx2/
cd /lib/firmware/bnx2/
wget https://github.com/cernekee/linux-firmware/raw/master/bnx2/bnx2-mips-09-6.2.1b.fw
wget https://github.com/cernekee/linux-firmware/raw/master/bnx2/bnx2-mips-06-6.2.3.fw
- 卸载旧的3.13内核
先查看下系统的内核版本:
dpkg -l|grep linux-image
我们新安装的系统内核是4.10.5,所以将列表中的3.13.0内核卸载掉:
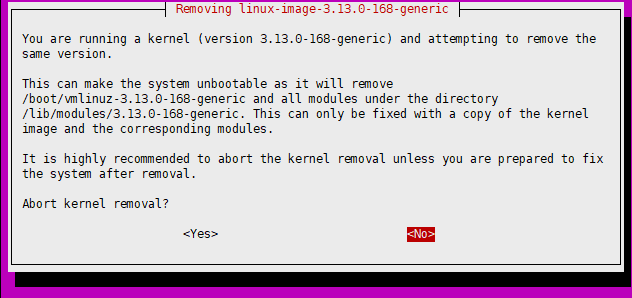
apt-get purge linux-image-3.13.0-* linux-image-extra-3.13.0-139-*提示当前正在运行于此内核上,默认是高亮左侧<Abort>忽略选项,记得方向键往右选择<No>继续卸载
再刷新GRUB:
update-grub最后开启我们心爱的BBR:
echo "net.core.default_qdisc=fq" >> /etc/sysctl.conf
echo "net.ipv4.tcp_congestion_control=bbr" >> /etc/sysctl.conf
重启,应该就ok了
查看是否开启bbr,可以输入以下代码查询:
sysctl net.ipv4.tcp_available_congestion_control返回值一般为:
net.ipv4.tcp_available_congestion_control = bbr cubic reno
或者为:
net.ipv4.tcp_available_congestion_control = reno cubic bbr
sysctl net.ipv4.tcp_congestion_control
返回值一般为:
net.ipv4.tcp_congestion_control = bbr
sysctl net.core.default_qdisc
返回值一般为:
net.core.default_qdisc = fq
lsmod | grep bbr
返回值有 tcp_bbr 模块即说明 bbr 已启动。注意:并不是所有的 VPS 都会有此返回值,若没有也属正常。
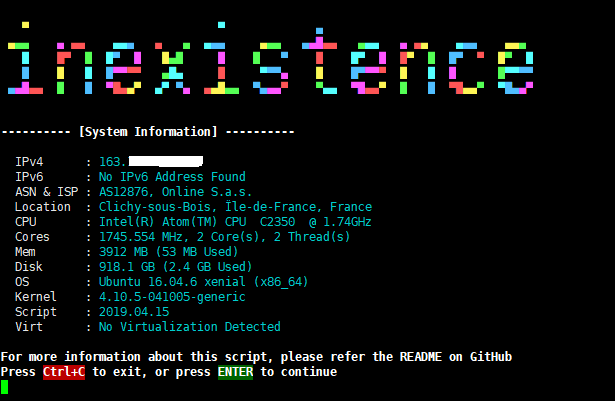
最后,开启我们星大的pt豪华脚本,即可起航:
https://github.com/Aniverse/inexistence

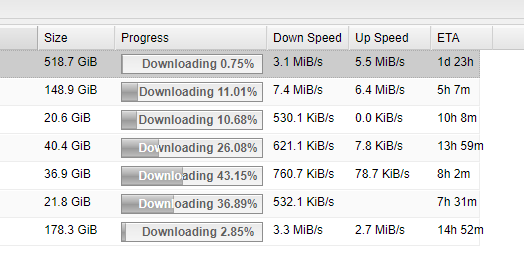
deluge默认配置测试了下,凑合能用,比百兆强一点,毕竟便宜
顺便可以改改sshd端口什么的,修改不能root登录之类的:vi /etc/ssh/sshd_config
Port 22改成你需要的端口,切记测试ok后再删掉22端口PermitRootLogin without password改成PermitRootLogin no
esc 后进入command 模式,输入:wq保存
最后重启下sshd服务:sudo service ssh restart
或sudo /etc/init.d/ssh restart
再看看是否能正常登录对应端口,一切就绪

2 comments
1.从文章复制代码的时候自动填充空格导致执行报错
2.dpkg -i linux - * .dec 笔误 应该是 deb
其实刷pt直接安装debian就行了,另外有的格式没做加工,别复制过头就好;
执行安装所有的deb文件包,我看了下似乎没错写成dec呀;
另外op现在系统版本已经不缺网卡驱动了,没有报错就不用安了,教程仅供参考思路,不用全照搬了